
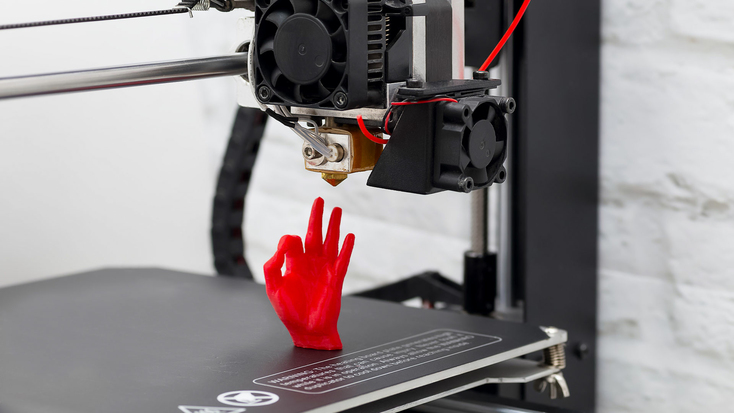
Unlike mass production with fixed tooling, low volume 3D printing (typically 1 to 100 units) offers flexible customization, no mold cost, and short lead times. It fits iterative product development, small-batch spare parts, and custom industrial tooling. Yet the nature of additive manufacturing makes cost and accuracy two competing priorities that must be managed together.
In low volume 3D printing, chasing ultra-high precision wastes material, lengthens print cycles, and drives expensive post-processing. Cutting cost too aggressively causes dimensional deviation, layer warping, poor surface flatness, and assembly failure. The goal is not the lowest price or the tightest tolerance, but accuracy suited to the application and a controlled total cost.
The Core Tension in Low Volume 3D Printing: Cost vs Accuracy
The cost of low volume 3D printing includes material, machine depreciation, print time, calibration labor, and post-processing. Accuracy is shaped by the process, material shrinkage, layer thickness, machine calibration, and nesting layout. Improve accuracy without restraint and cost rises; reduce cost without discipline and the parts drift out of tolerance.
Two mistakes are common. The first is over-specification: using high-precision SLA, SLS, or metal processes for ordinary structural parts that never needed tight tolerances. The second is blind cost cutting: reducing layer precision, skipping calibration, or simplifying post-processing on parts that must assemble. Both raise total cost, one through wasted capability and the other through scrap.
Reasonable process matching and precision grading can cut the comprehensive cost of low volume 3D printing substantially while keeping parts within an acceptable industrial tolerance. The saving comes from doing only the precision work the function actually requires.
Process Selection in Low Volume 3D Printing
Every printing process has an inherent balance of accuracy, material cost, and time. Choosing the process that fits the part’s use is the most effective way to control cost in low volume 3D printing without sacrificing the accuracy that matters.
| Process | Typical tolerance | Best use |
|---|---|---|
| FDM | ±0.2 to ±0.5 mm | Internal supports, fixtures, non-assembly parts |
| SLA | around ±0.05 mm | Visual prototypes, assembly checks, electronic housings |
| SLS / MJF | around ±0.1 mm | Nylon functional parts, wear components, stacked batches |
| Metal printing | High accuracy, high cost | High-load, high-precision industrial parts |
FDM has the lowest material and equipment cost and is fast for simple parts, but it needs shrinkage compensation on PLA and ABS to avoid dimensional drift. SLA delivers a smooth surface and good consistency at moderate cost, which suits visual prototypes and assembly verification. SLS and MJF need no supports and become economical when a batch exceeds roughly twenty parts, because parts can be nested densely. Metal processes such as DMLS and SLM are accurate and strong but far too expensive for conventional low volume 3D printing, so they belong in high-load, high-precision cases only.

Precision Grading to Avoid Over-Engineering
The biggest waste in low volume 3D printing is applying one high-precision setting to the entire part. Industrial components rarely need ultra-tight tolerances on every feature. Grading precision by functional zone protects performance while removing unnecessary cost.
Non-critical areas such as appearance surfaces and non-matching structures can accept plus or minus 0.2 to 0.5 millimeters using standard parameters. Conventional matching areas, including ordinary assembly holes and contact faces, are typically held near plus or minus 0.1 millimeter. High-precision zones such as bearing holes, precision fits, and functional mating surfaces may need plus or minus 0.05 millimeter, fine layers, and targeted post-processing.
Identifying these zones on the drawing before quoting is essential. A supplier who knows which features are critical can focus calibration and finishing there and leave the rest as printed. Without that guidance, every feature is treated the same and the buyer pays for precision that adds no value.
Strategies to Balance Cost and Accuracy
Optimize nesting layout
Many low volume 3D printing orders underuse the build volume. Thoughtful nesting spreads machine and time costs across more parts. In SLS, loose powder acts as natural support, so dense, well-planned layouts can raise batch output significantly and lower the per-part cost of energy and depreciation.
Match material to the requirement
High-performance materials such as high-temperature resin and reinforced nylon cost far more than standard options. Where the environment and load are ordinary, conventional materials meet the accuracy standard. Reserve premium grades for genuine needs such as heat, wear, or insulation.
Standardize post-processing
Post-processing is an easily overlooked cost center. Unnecessary polishing, blasting, or secondary machining adds labor and time. Define rules that finish only key precision surfaces and leave non-critical surfaces as printed. This keeps the delivered part accurate where it matters without paying for cosmetic work nobody needs.
Control calibration and environment
Most accuracy errors in low volume 3D printing come from uncalibrated machines and unstable conditions. Thermal shrinkage, layer deviation, and warping are reduced by regular platform calibration, temperature control, and shrinkage compensation. Preventing rework and scrap is the most direct way to control total cost on small batches.

Common Mistakes in Low Volume 3D Printing
- Using uniform high-precision parameters, which lengthen print time without improving performance.
- Ignoring material shrinkage compensation, producing a consistent dimensional error across the batch.
- Simplifying post-processing on key mating surfaces until they no longer meet the requirement.
- Poor nesting that wastes build space and machine time.
- Choosing a process before defining which tolerances actually matter.
Each mistake is avoidable with a short review before production. Confirm the critical features, agree the process, and state the inspection scope in writing. A few minutes of clarification is cheaper than reprinting a batch.
Quoting and Inspecting a Low Volume 3D Printing Order
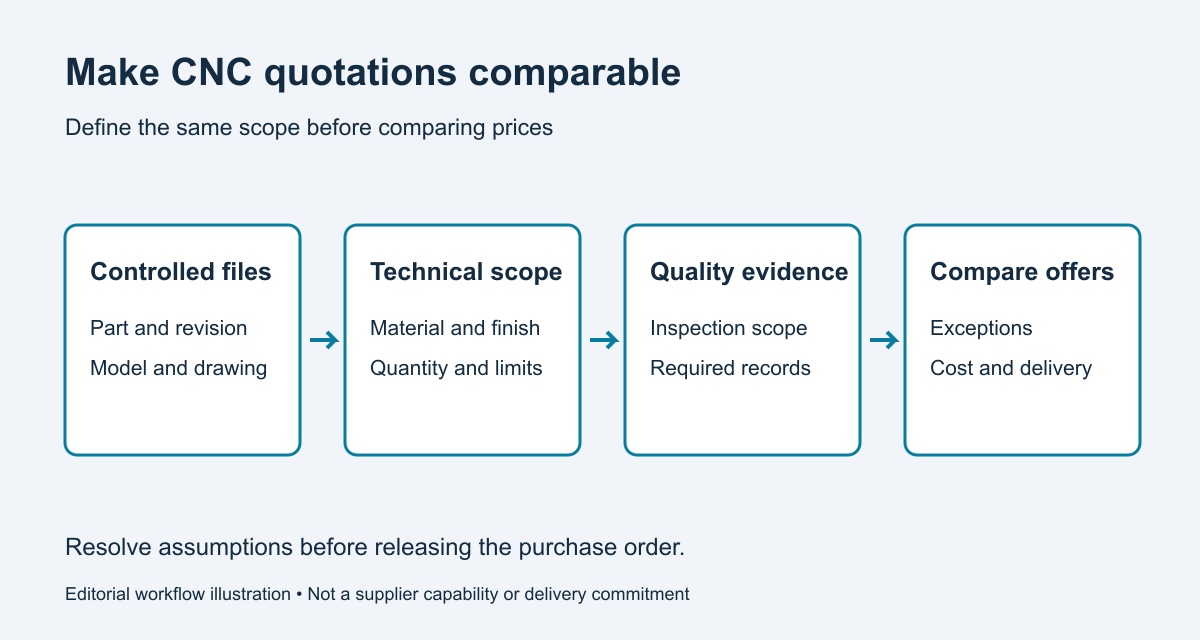
A useful quotation for low volume 3D printing states the process, material grade, layer height, post-processing, inspection scope, and delivery condition. It separates one-time setup from per-part cost and identifies any assumption, such as a relaxed tolerance or a substitute material. Treat an assumption as a proposal to review, not an approved change.
Inspection should focus on the features that control fit and function. Agree how they will be measured and when the report is issued. For guidance on separating size, form, and relationship requirements, see our tolerances, fit, and function guide. An independent overview of technical drawing preparation also explains why the model and drawing must agree.
Teams that also need machined parts can review our CNC machining services and request an engineering review before releasing an order.
Frequently Asked Questions
When does low volume 3D printing beat injection molding? When quantities are small, designs change often, or tooling cost cannot be justified. Molding becomes economical only at much higher volumes.
How tight a tolerance is realistic? It depends on the process and material. SLA can reach around plus or minus 0.05 millimeters, while FDM is usually looser. Grade tolerances by feature rather than applying one value everywhere.
How can I reduce the unit cost? Nest parts efficiently, choose the least expensive process that meets the requirement, avoid premium materials unless needed, and finish only critical surfaces.
Design Choices That Lower Cost in Low Volume 3D Printing
Cost control in low volume 3D printing starts at the design stage, long before a machine runs. A part designed for additive manufacturing uses less material, prints faster, and needs less finishing than a part simply copied from another process. Small decisions here have a large effect on the quoted price.
Orient the part so that supports are minimized. Every support structure adds material, print time, and a surface that must be cleaned or finished. Where supports are unavoidable, place them on non-critical faces so that removal does not damage a functional surface. Simple orientation changes can reduce both cost and post-processing effort.
Keep wall thickness consistent. Thick solid sections waste material and create residual stress that can warp the part, while very thin walls may fail or print poorly. Hollow sections with uniform walls usually print faster and more reliably. Adding ribs is often stronger and cheaper than thickening an entire panel.
Avoid unnecessary detail on hidden faces. Text, logos, and cosmetic features cost time only if someone will see them. If a marking is required, specify it as a separate operation and agree which faces need it. This keeps low volume 3D printing focused on the features that serve the function.
Understanding the True Cost Structure
A printed part price is more than the material consumed. Machine time, calibration, labor, and post-processing all contribute, and their relative weight changes with quantity. Understanding the structure helps buyers see why a slightly higher quoted part can be cheaper in practice.
Fixed costs such as setup and calibration are spread across the number of parts in the batch. A very small order carries a larger share of these costs per part, which is why unit price falls as quantity rises. Asking for a realistic batch size, rather than a token quantity, often produces a more meaningful quote.
Post-processing is frequently underestimated. Support removal, sanding, priming, and secondary machining can take as long as the print itself. In low volume 3D printing, agreeing which surfaces need finishing prevents a supplier from quoting a generic full-finish route that the part does not require.
Rework is the most expensive item of all. A batch that must be reprinted because of dimensional drift wastes material, machine hours, and schedule. Calibration, shrinkage compensation, and a clear inspection plan are modest costs by comparison, and they protect the integrity of the whole order.
Shrinkage, Warping, and Material Behavior
Different materials shrink by different amounts as they cool or cure. PLA and ABS in FDM printing can require compensation on the order of a fraction of a percent, while resins and powders behave differently again. Ignoring this behavior produces parts that are consistently off size, even when the machine is well calibrated.
Warping is closely related. Large flat areas and sharp corners concentrate stress and lift from the build platform. A chamfer, a radius, or a revised orientation often reduces the problem without changing the part’s function. Discussing these details early lets the supplier tune the build rather than fight it during production.
Material selection also affects long-term stability. Nylon absorbs moisture, some resins become brittle with age, and high-temperature applications may demand special grades. In low volume 3D printing, choosing a material that simply meets the service environment avoids both premature failure and the cost of an unnecessary premium grade.
Deciding When to Move Beyond Printing
Low volume 3D printing is ideal for early stages, but it is not always the final manufacturing route. As demand grows, a design that printed well may become cheaper and more consistent by machining or molding. Recognizing this transition keeps costs aligned with volume.
Signs that a change may be due include repeatedly nesting the same part, demand for tighter tolerances across every unit, or a finish that is hard to achieve consistently by printing. At that point, a machined route can hold critical features more reliably. Many teams keep printing for prototypes and fixtures while moving production parts to machining.
Because the design has already been validated, transferring it is usually straightforward. Keep the drawing, tolerance decisions, and inspection criteria together so the new process is judged against the same requirements. For teams that need both routes, our CNC machining services can support the move from printed prototypes to production quantities.
Building a Repeatable Low Volume 3D Printing Process
A single accurate batch is useful, but repeatability is what makes low volume 3D printing a dependable supply route. Repeatability comes from freezing the variables that influence the result: the machine, material lot, orientation, parameters, and finishing steps. Once a build is validated, record it and reuse it.
If any of those variables must change, treat it as a process change. Confirm that the affected parts still meet the agreed criteria before shipping production quantities. This is especially important when a supplier switches material lots or moves a job to a different machine.
Keep inspection results with the build record. Over several orders, the data shows whether the process is stable and where variation creeps in. That record turns purchasing from a series of one-off transactions into a controlled, predictable relationship.
Final Thoughts on Low Volume 3D Printing
Low volume 3D printing rewards disciplined decisions. Choose the process that fits the part, grade tolerances by function, nest efficiently, match materials to the real environment, and standardize post-processing. Each step protects accuracy where it matters and removes cost where it does not.
Neither extreme works. Blind precision wastes money, and blind cost cutting produces parts that fail to assemble. A balanced approach defines what the part must do, then spends only what is needed to achieve it. With that discipline, low volume 3D printing can deliver accurate parts quickly and at a controlled total cost.
Questions to Ask Before You Order
A short list of questions can prevent most problems in low volume 3D printing. Start with function: which features control fit, load, or appearance? Then ask which process the supplier recommends and why. A good answer refers to the part’s requirements, not to a single process the shop happens to run.
Next, confirm the material grade and whether certificates are available. Ask about shrinkage compensation and how calibration is controlled, because these determine whether a batch will match the drawing. For parts that must assemble, request a first-article check on the critical features and agree when the report will be issued.
Finally, clarify what is included in the price. Does it cover support removal, basic finishing, inspection, and packaging, or are these added later? In low volume 3D printing, exclusions are a common reason two quotations are not comparable. Putting the scope on one page makes the decision straightforward and avoids surprises when the invoice arrives.
Working With a Supplier
The best results come from an early conversation between design and supply. Share the model and drawing together, state the quantities you expect, and identify which features are critical. If future demand is uncertain, label it as a forecast rather than a firm commitment. Suppliers can then plan nesting and material use more effectively, and the quotation will reflect the real intent.
When a supplier proposes a change, such as a different orientation, a relaxed non-critical tolerance, or an alternative material, evaluate it against the function rather than rejecting it automatically. Many such suggestions reduce cost without affecting performance. Record accepted changes against a revised document so that later orders are built to the same basis.
Good communication also helps when something goes wrong. If a batch shows dimensional drift, the build record makes it possible to identify the cause rather than guessing. This is why the combination of a clear drawing, a frozen process, and inspection evidence is so valuable in low volume 3D printing.
In summary, treat accuracy as a requirement to be placed only where it is needed, and treat cost as a total to be managed rather than a single number to be minimized. When both are defined clearly at the start, a supplier can propose a process that satisfies the part without waste. That is the practical difference between a cheap print and a part that works.