
Introduction
When you request a quote for a metal stamping project, the number on the page can feel like a black box. Why does one part cost $0.12 each and a seemingly similar part cost $0.85? Where does the money actually go?Understanding the cost structure behind stamped metal parts isn’t just about negotiating better prices — it’s about designing smarter, choosing the right supplier, and making decisions that save money at every stage of production. In this breakdown, we’ll dissect every major cost component, explain what drives each one, and highlight where you have the most leverage to reduce expenses.
1. Tooling & Die Costs: The Upfront Investment
Typical share: 30–70% of first-order cost (amortized over production volume)
Tooling is almost always the single largest line item on your first stamping quote — and for good reason. A precision stamping die is a custom-engineered piece of tooling, machined to tolerances measured in microns, built to survive millions of cycles under tons of pressure.
What’s included
- Die design & engineering: CAD/CAM work, simulation, DFM review
- Die materials: Tool steel (D2, A2, M2), carbide inserts for high-wear areas
- Machining & assembly: Wire EDM, grinding, heat treatment, fitting
- Tryout & validation: First-article inspection, die tuning on press
Cost drivers
- Complexity: A simple blanking die costs a fraction of a progressive die with 12+ stations
- Part size: Larger parts mean larger dies — material and machining costs scale up fast
- Tolerance requirements: Tighter tolerances demand higher precision machining and longer build time
- Expected volume: High-volume dies use premium materials and coatings to extend die life
Leverage point
Tooling is a fixed cost. The more parts you run, the lower the per-unit tooling amortization. A $15,000 die spread across 10,000 parts adds $1.50 per unit. Spread across 1,000,000 parts? It’s $0.015 per unit. If you’re planning long-term production, investing in a more durable die upfront almost always pays off.
2. Material Costs: The Raw Foundation
Typical share: 25–50% of per-unit cost
Sheet metal is the physical product you’re paying for, and its cost is directly tied to commodity markets, material grade, and how efficiently the stamping layout uses the coil.
What’s included
- Base material cost: Steel, stainless steel, aluminum, copper, or brass — priced by weight or sheet area
- Scrap rate: The percentage of material that becomes skeleton, slugs, or offcuts
- Material premium: Special finishes, coatings, or certified materials (e.g., medical-grade stainless)
Cost drivers
- Material type & grade: CR steel is cheap; titanium or high-nickel alloys are exponentially more expensive
- Material thickness: Thicker stock = more weight per part = higher cost
- Nesting efficiency: How tightly parts can be arranged on the sheet. Irregular shapes waste more material
- Coil width: Standard coil widths optimize material usage; custom widths carry a premium
Leverage point
Material yield is one of the most underappreciated optimization targets. A well-designed blank layout that improves material utilization from 60% to 75% cuts material cost by 20% — and the savings compound across every part you produce. Designing parts with nesting in mind is a DFM principle that pays for itself quickly.
3. Press Time & Labor: The Production Run
Typical share: 10–30% of per-unit cost
Every minute a stamping press is running your part, it’s costing money. Press time isn’t just machine depreciation — it’s the operator’s time, floor space, utilities, and the opportunity cost of not running a different job.
What’s included
- Press operation: Machine hour rate, which factors in depreciation, maintenance, and overhead
- Operator labor: Setup, monitoring, part inspection, and unloading
- Setup / changeover time: Die installation, alignment, and first-piece approval
Cost drivers
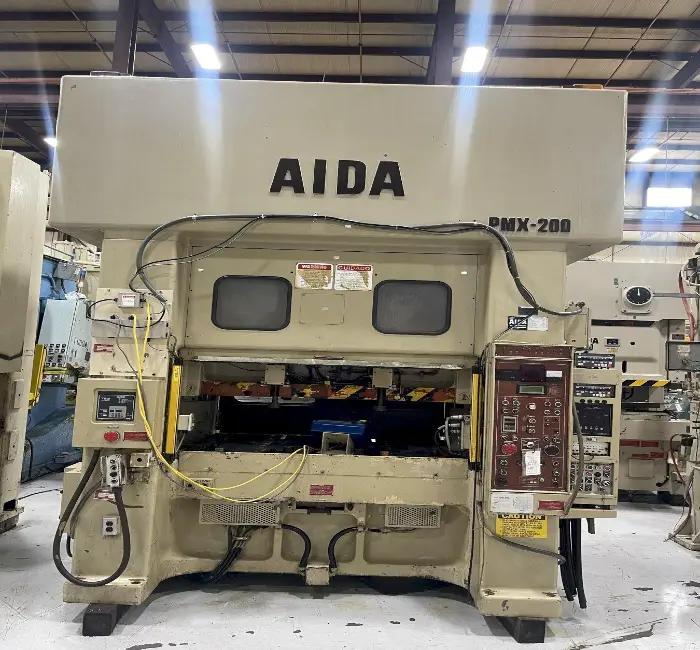
- Press size: A 600-ton press costs more per hour than a 60-ton press. Part size and force requirements dictate the minimum press tonnage
- Cycle speed: Simple blanking can run 300+ strokes per minute; complex deep drawing might be 20 SPM
- Number of operations: A single-operation die needs one press setup. Multiple secondary operations multiply labor and handling time
- Batch size: Setup time is fixed per run. Small batches mean setup cost is spread across fewer parts
Leverage point
Progressive dies are the single biggest lever here. By performing multiple operations in a single press stroke, progressive tooling dramatically reduces labor, handling, and cycle time per part. The tradeoff is higher tooling cost — which is why volume is the deciding factor. For high-volume parts, progressive dies almost always win on total cost.
4. Secondary Operations: Beyond the Press
Typical share: 5–35% of per-unit cost (varies enormously by part)
Stamping is rarely the end of the line. Most parts need at least one secondary operation before they’re ready to ship — and each one adds cost, lead time, and risk.
Common secondary operations
- Deburring & finishing: Removing sharp edges, polishing, vibratory tumbling
- Threading & tapping: Adding threaded holes or inserts
- Welding & assembly: Joining multiple stamped components
- Surface treatment: Plating (zinc, nickel, chrome), powder coating, anodizing, passivation
- Heat treatment: Hardening, annealing, or stress relieving
- Inspection & testing: CMM measurement, hardness testing, salt spray testing
Cost drivers
- Number of operations: Each additional process adds handling, setup, and potential rework
- Specialty requirements: Medical or aerospace-grade certifications add cost to every downstream process
- Outsourcing: If the stamper doesn’t do plating in-house, you’re paying a markup plus shipping
Leverage point
Consolidate. Every time a part leaves one facility for another, you’re paying for shipping, handling, and queue time. Choosing a stamping partner with in-house secondary capabilities — or designing parts that require fewer post-press operations — can cut total cost significantly. Also, ask yourself: does this part really need that cosmetic finish, or would a standard industrial finish be sufficient?
5. Quality, Inspection & Overhead
Typical share: 5–15% of per-unit cost
These are the costs that don’t make the headlines but are baked into every quote. They’re also the costs that separate reliable suppliers from ones that save you money on paper and cost you a fortune in defects.
What’s included
- In-process inspection: SPC, dimensional checks, visual inspection
- First Article Inspection (FAI): Detailed dimensional report for initial production run
- Quality systems: ISO 9001, IATF 16949, or AS9100 certification costs
- General overhead: Engineering support, project management, facility costs
- Packaging & shipping: Protective packaging, freight, import duties if offshore
Cost drivers
- Industry certification requirements: Automotive and aerospace quality systems add overhead
- Inspection rigor: 100% inspection costs more than AQL sampling
- Geography: Domestic suppliers have higher overhead; offshore suppliers add shipping and import costs
Leverage point
Don’t pay for inspection you don’t need — but don’t skip inspection you do need. A $0.02 per-part savings that results in a $50,000 field failure is a terrible deal. Work with your supplier to define appropriate AQL levels based on part criticality, and build long-term relationships so you can trust their process control rather than paying for redundant inspection.
6. The Hidden Costs: What Your Quote Doesn’t Show
Not every cost appears as a line item. These factors affect your total cost of ownership even if they don’t show up on the initial quote:
Tooling maintenance & regrinding
Dies wear. Punch points dull. Every 50,000 to 500,000 strokes (depending on material and die quality), the die needs maintenance. Budget for it.
Rework & scrap
Even the best stamping processes produce some scrap — typically 1–3% of production. If your part is complex or your tolerances are tight, expect higher scrap rates.
Lead time & inventory
Cheaper offshore stamping comes with 8–16 week lead times and minimum order quantities that force you to carry more inventory. The cost of tying up capital in warehouse stock is real.
Design changes
Modifying a production die is expensive. A simple change might cost $500–$2,000; a major redesign can cost half the original tool price. Thorough DFM review before tooling is built is the cheapest insurance you can buy.
Real-World Example: A Simple Bracket
Let’s put this all together with a realistic example — a 2″ x 3″ mild steel mounting bracket, 1.5mm thick, produced in a progressive die at 100,000 pieces per year.
| Cost Component | Per Unit | Annual Total | % of Total |
|---|---|---|---|
| Tooling amortization | $0.08 | $8,000 | 13% |
| Material (steel + scrap) | $0.22 | $22,000 | 37% |
| Press time & labor | $0.15 | $15,000 | 25% |
| Deburring + plating | $0.10 | $10,000 | 17% |
| Quality & overhead | $0.05 | $5,000 | 8% |
| Total | $0.60 | $60,000 | 100% |
In this scenario, material is the largest single cost driver — meaning material yield optimization would deliver the biggest per-unit savings. Tooling, while significant upfront, is only 13% of the total when spread across 100,000 parts.
Key Takeaways for Cost Optimization
- Design for nesting first. Material is usually the biggest per-unit cost. Even small improvements in blank layout compound across your entire production run.
- Match tooling investment to production volume. Spending more on a progressive die makes sense at 100,000+ parts. At 5,000 parts, a simpler single-stage die is probably the better call.
- Minimize secondary operations. Every process after the press adds cost, lead time, and risk. If you can eliminate a deburring step or combine two parts into one stamping, do it.
- Don’t optimize in isolation. The cheapest per-part quote doesn’t always mean the lowest total cost. Factor in tooling longevity, defect rates, lead times, and shipping.
- Invest in DFM up front. A few hours of engineering review before tooling is built can prevent thousands in modification costs later.